> For the complete documentation index, see [llms.txt](https://docs.bulkemailsetup.com/llms.txt). Markdown versions of documentation pages are available by appending `.md` to page URLs; this page is available as [Markdown](https://docs.bulkemailsetup.com/cloudapp/popular-topics/contacts/export-contacts.md).
# Export Contacts
Export your contacts in just a few clicks. Learn how to export contact data for analysis, backup, or transferring subscribers to other platforms.
Exporting your contact lists is an essential feature that allows you to back up, analyze, or transfer your data. Our Email App offers multiple ways to export contacts, including normal exports and advanced options. Here's how you can manage your export processes:
### 1. Normal Export
A **Normal Export** allows you to export the entire contact list, including all available fields (e.g., email, name, status). This is useful when you want a complete copy of your list for further analysis or backup.
Steps to perform a normal export:
1. Go to the **Contacts** section.
2. Select and open the contact list you want to export.
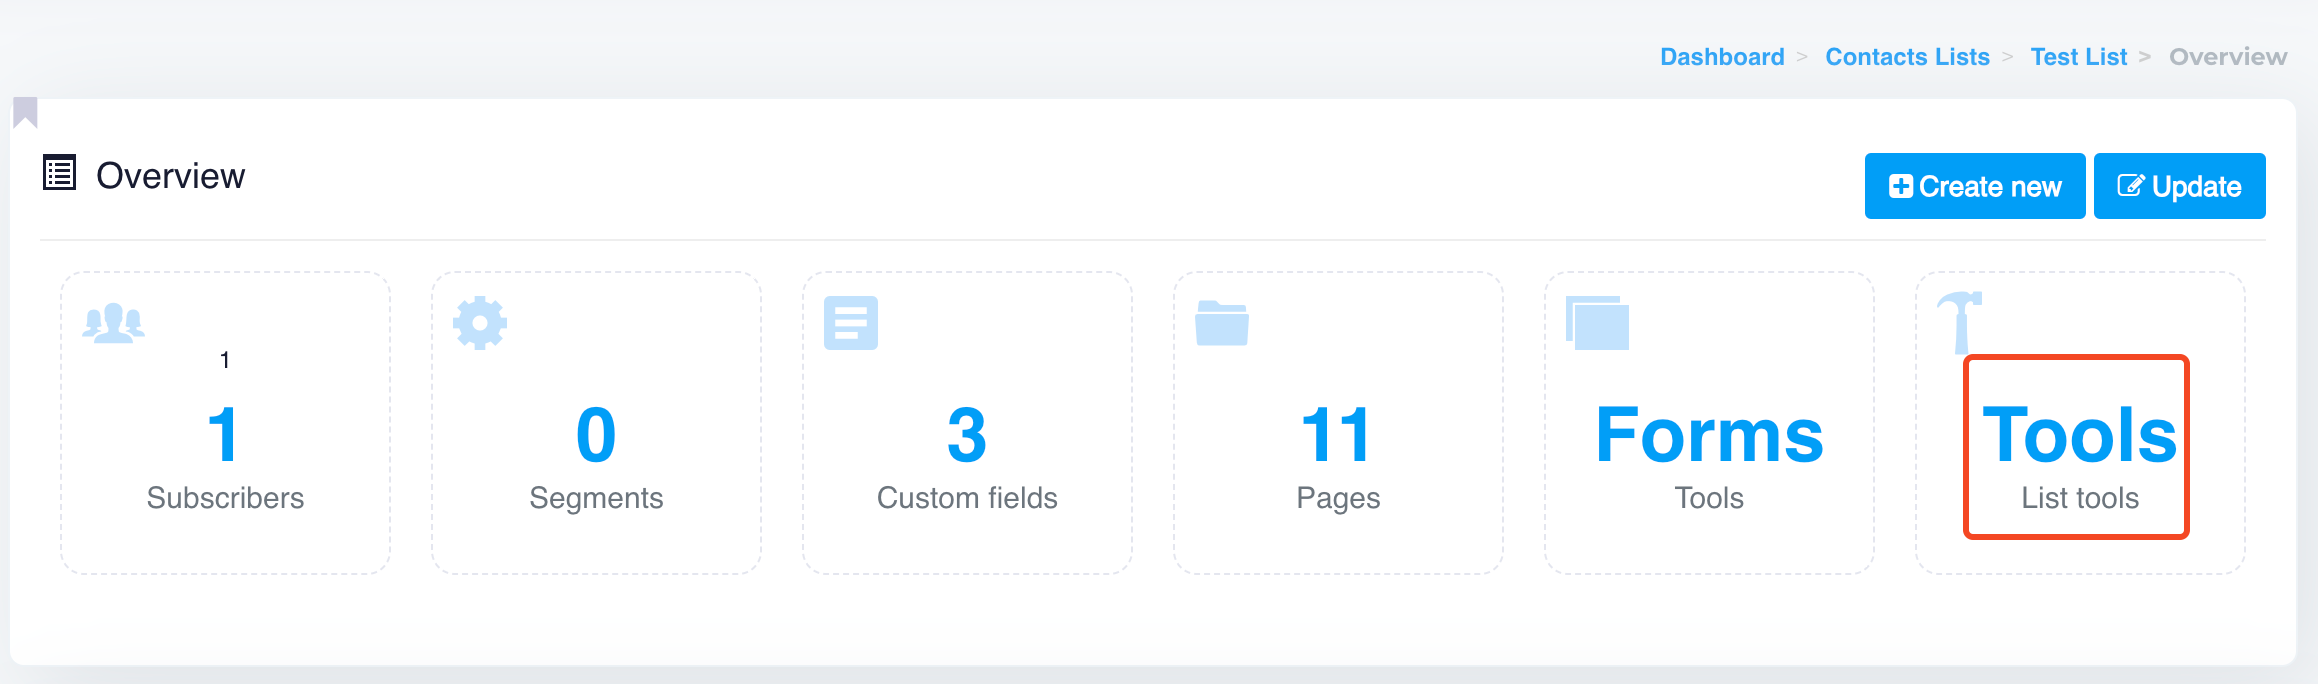
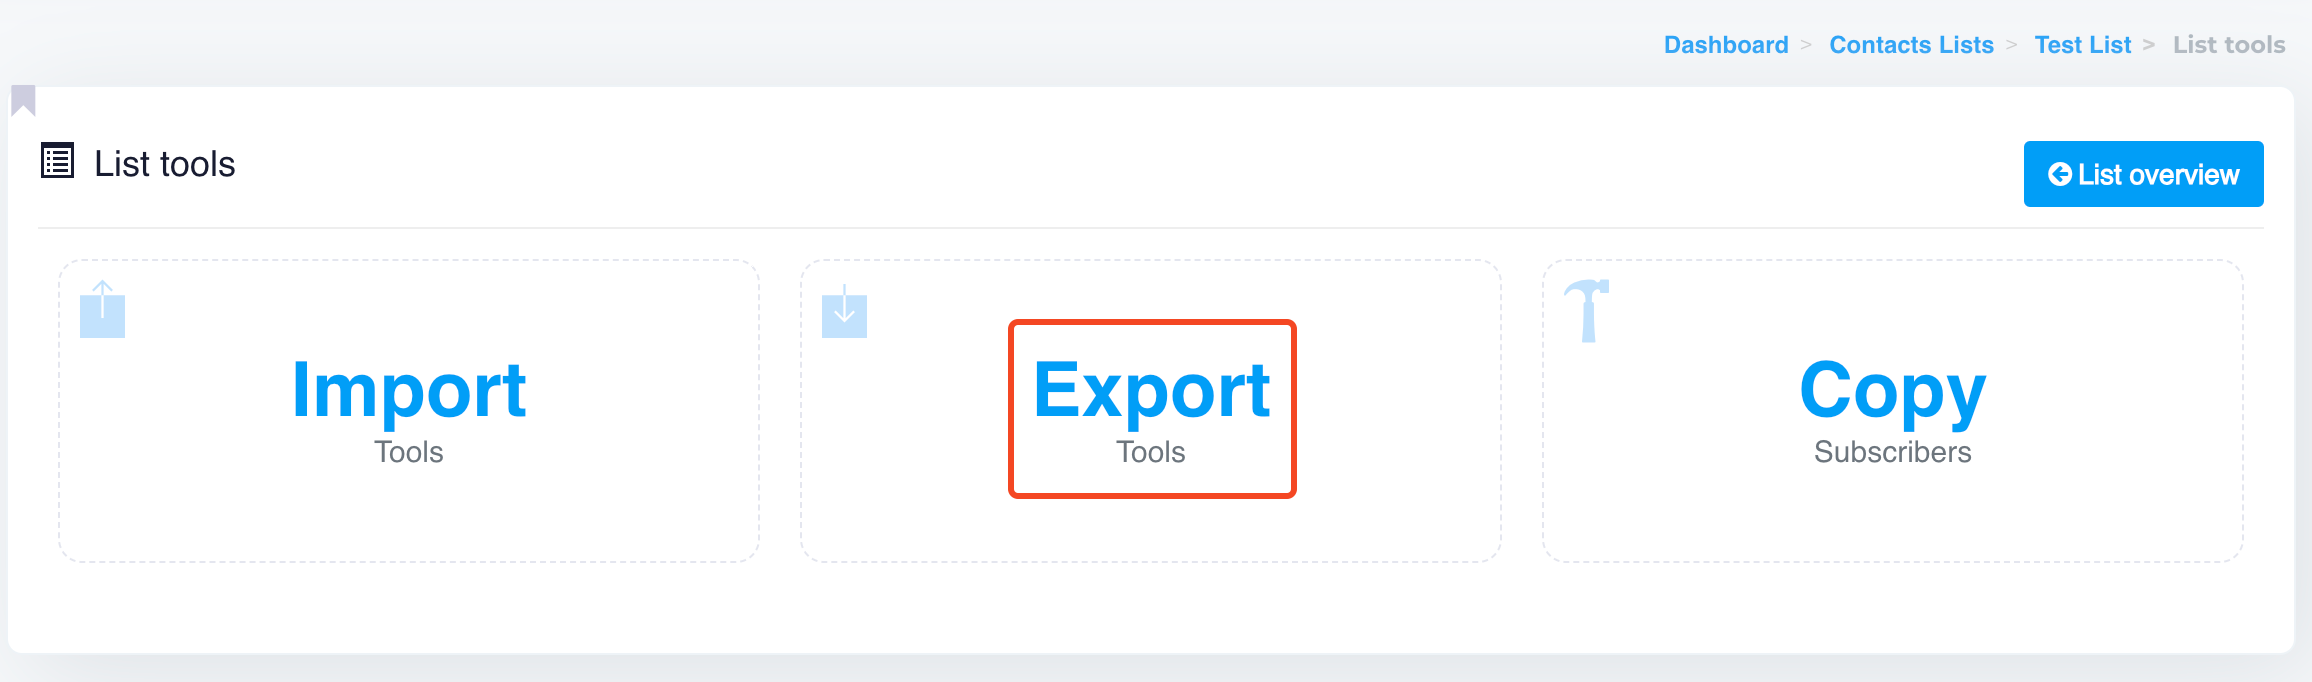
3. Click on the **Tools** and then select the **Export** option.
4. Choose the file format (typically CSV) and confirm the export.
This method will include all fields and data associated with the list.
***
### 2. Advanced Export (Email Column Only)
If you need to export just the email addresses without other contact information, you can use the **Advanced Export** option. This is helpful when you want to focus only on the email field for specific uses, like adding these addresses to another list.
Steps for advanced export (email only):
1. Go to the **Contacts** section and click on "**All subscribers**" button.
2. Click on the **Filters** button , select your desired list (or multiple lists), choose the Status such as Confirmed (for active contacts), Unsubscribes, or Hard Bounces (or multiple choices),
3. Choose Action as **View**, and then click Submit.
4. Confirm and download the CSV file.
This method provides a leaner export, focusing only on the email addresses from your list.
***
### 3. Exporting Unsubscribes and Hard Bounces
{% hint style="info" %}
Note: **You do not have to manually remove unsubscribes or hard bounces** from the system, as the system **handles this automatically**.
For any future campaigns, when you use any list, emails will only be sent to active contacts and not to unsubscribed or hard-bounced addresses.
{% endhint %}
Our Email App allows you to export unsubscribes or hard bounces, even across all lists.
To export all unsubscribes or hard bounces:
1. Go to the **Contacts** section and click on "**All subscribers**" button.
2. Click on the **Filters** button to search for Unsubscribes or Hard Bounces. Select your desired list, set the Status to Unsubscribes or Hard Bounces (or both), choose Action as **Export**, and then click **Submit**.
3. Download the list of unsubscribed or hard-bounced email addresses.
You can use this export to manage or clean your lists.
***
These export options give you flexibility in managing your contact lists, allowing you to export complete lists, specific fields, or filtered data like unsubscribes or bounces.
 2. Click on the **Filters** button
  , select your desired list (or multiple lists), choose the Status such as Confirmed (for active contacts), Unsubscribes, or Hard Bounces (or multiple choices),
3. Choose Action as **View**, and then click Submit.
4. Confirm and download the CSV file.
This method provides a leaner export, focusing only on the email addresses from your list.
***
### 3. Exporting Unsubscribes and Hard Bounces
{% hint style="info" %}
Note: **You do not have to manually remove unsubscribes or hard bounces** from the system, as the system **handles this automatically**.
For any future campaigns, when you use any list, emails will only be sent to active contacts and not to unsubscribed or hard-bounced addresses.
{% endhint %}
Our Email App allows you to export unsubscribes or hard bounces, even across all lists.
To export all unsubscribes or hard bounces:
1. Go to the **Contacts** section and click on "**All subscribers**" button.
, select your desired list (or multiple lists), choose the Status such as Confirmed (for active contacts), Unsubscribes, or Hard Bounces (or multiple choices),
3. Choose Action as **View**, and then click Submit.
4. Confirm and download the CSV file.
This method provides a leaner export, focusing only on the email addresses from your list.
***
### 3. Exporting Unsubscribes and Hard Bounces
{% hint style="info" %}
Note: **You do not have to manually remove unsubscribes or hard bounces** from the system, as the system **handles this automatically**.
For any future campaigns, when you use any list, emails will only be sent to active contacts and not to unsubscribed or hard-bounced addresses.
{% endhint %}
Our Email App allows you to export unsubscribes or hard bounces, even across all lists.
To export all unsubscribes or hard bounces:
1. Go to the **Contacts** section and click on "**All subscribers**" button.