> For the complete documentation index, see [llms.txt](https://docs.bulkemailsetup.com/llms.txt). Markdown versions of documentation pages are available by appending `.md` to page URLs; this page is available as [Markdown](https://docs.bulkemailsetup.com/popular-topics/contacts/segment.md).
# Segment
Master the art of email segmentation. Discover how to create targeted contact segments based on custom criteria to increase engagement and campaign success.
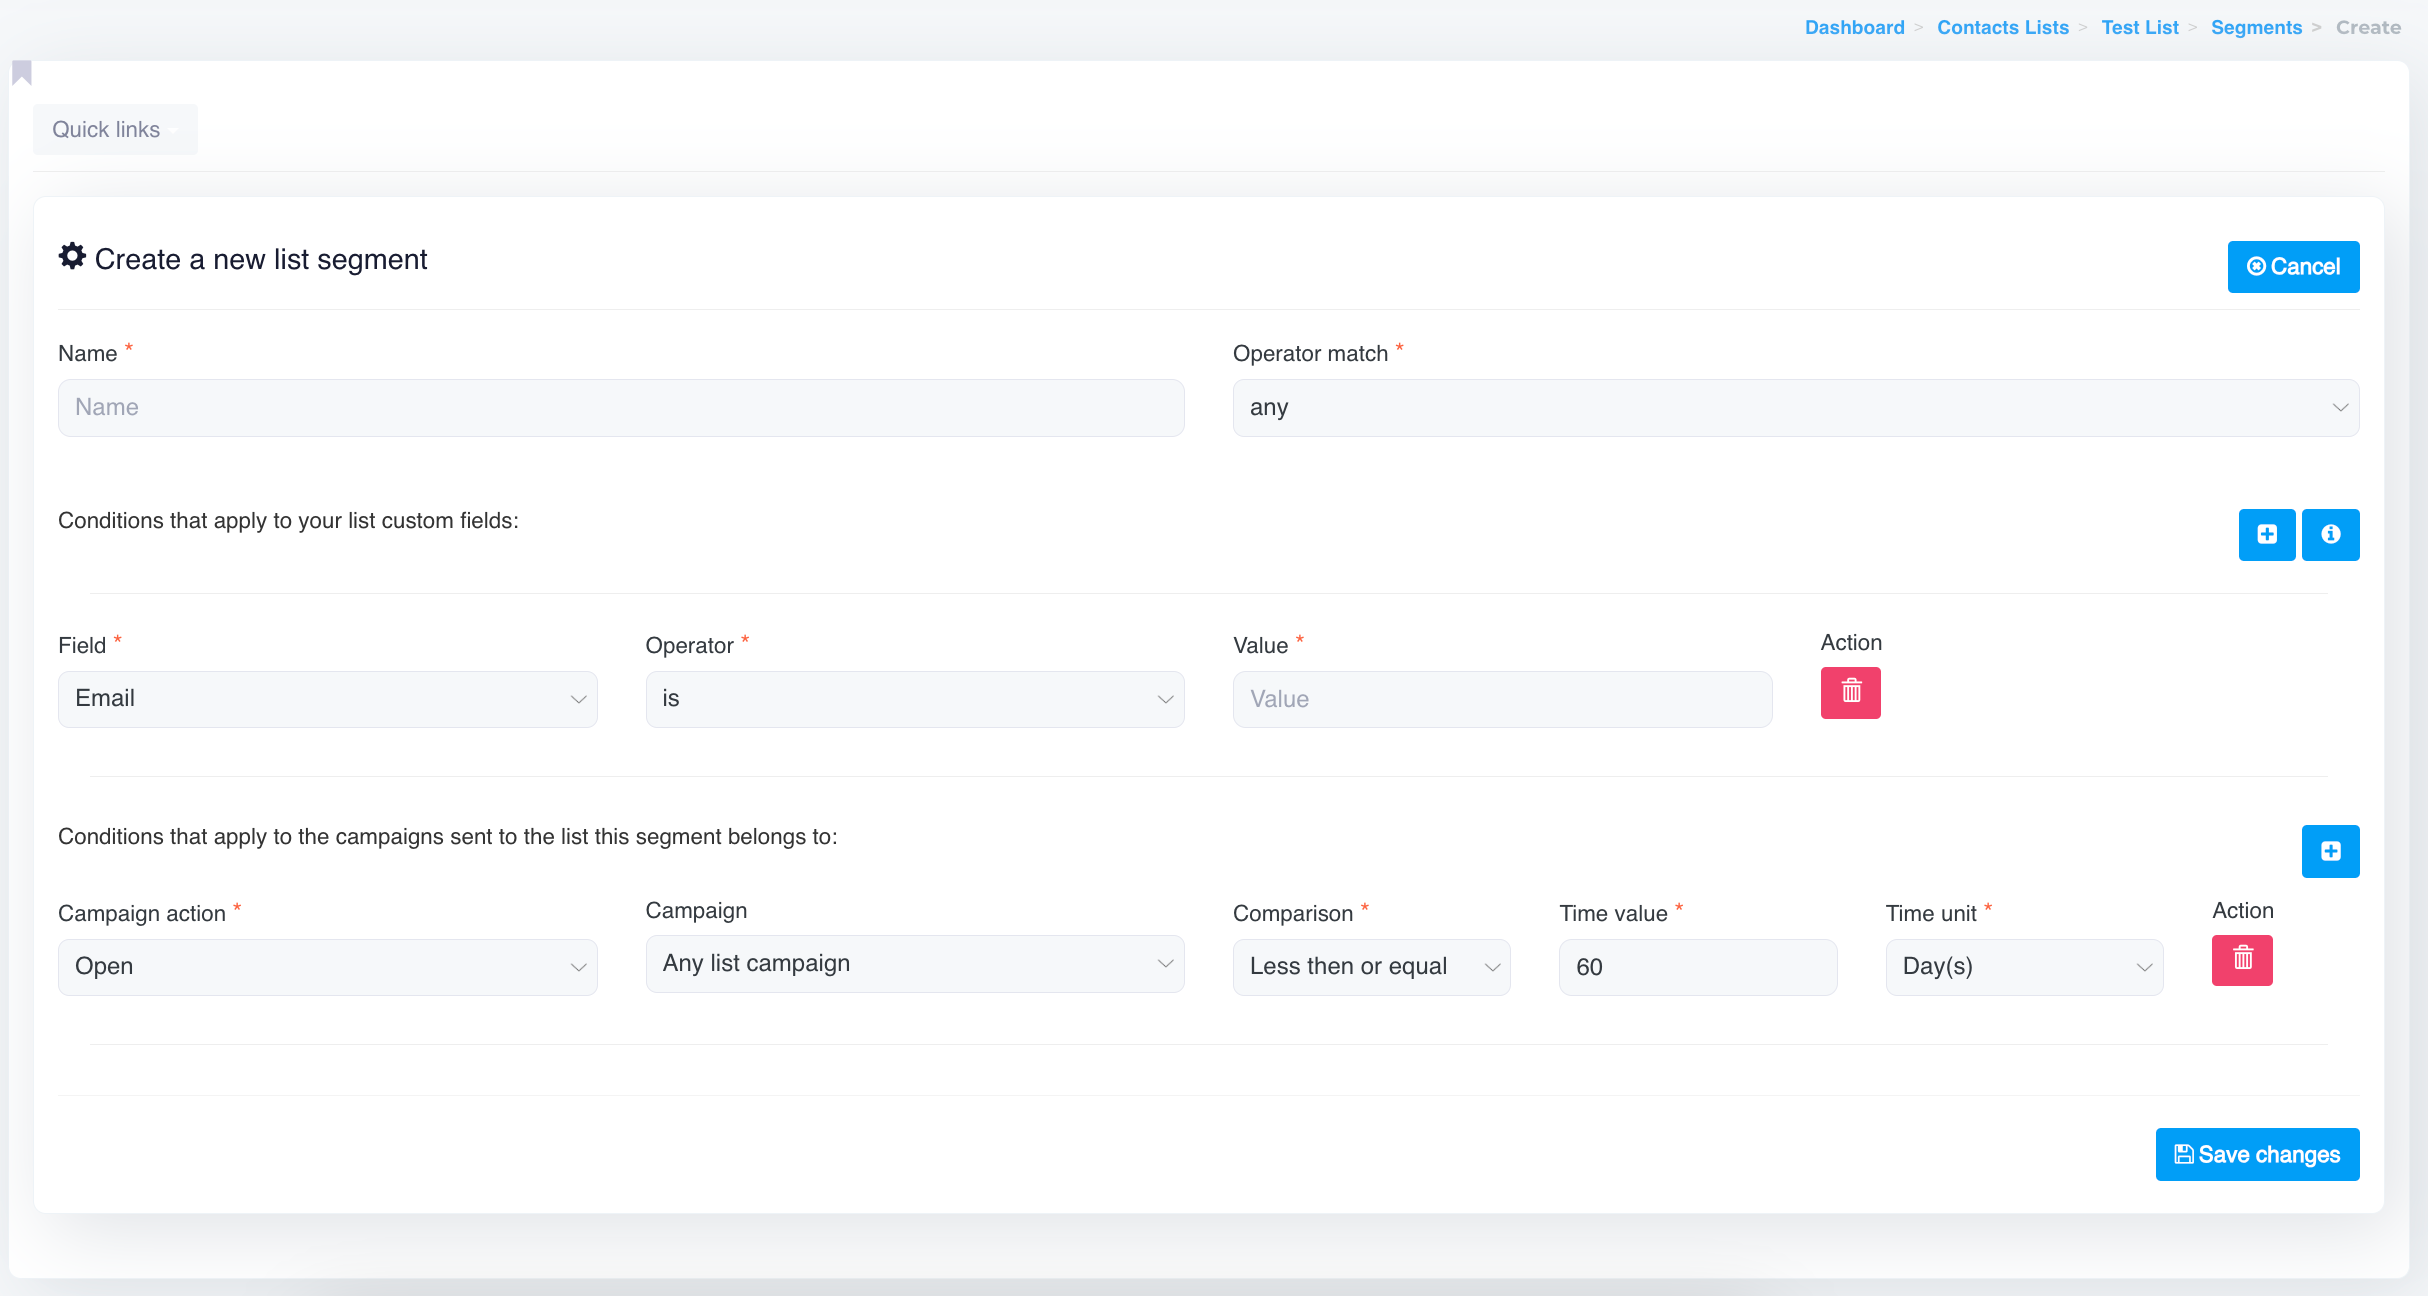
Segments allow you to target specific contacts based on custom conditions. Here's how to create a new list segment using the available options.
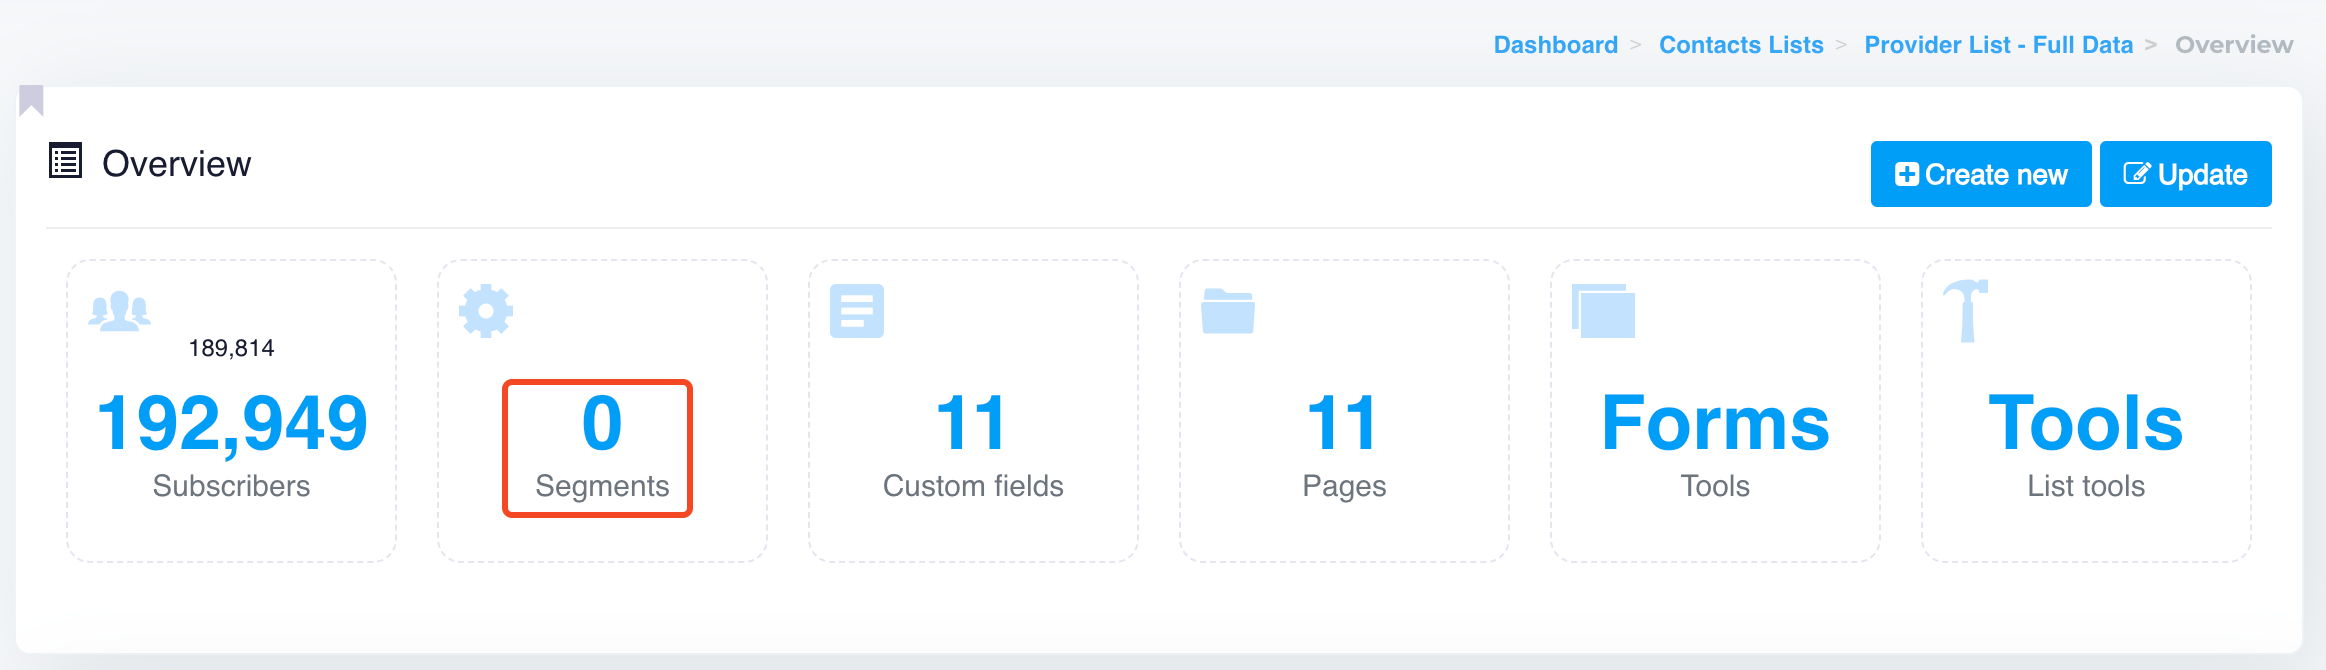
Go to the **Contacts** section, select the desired contact list
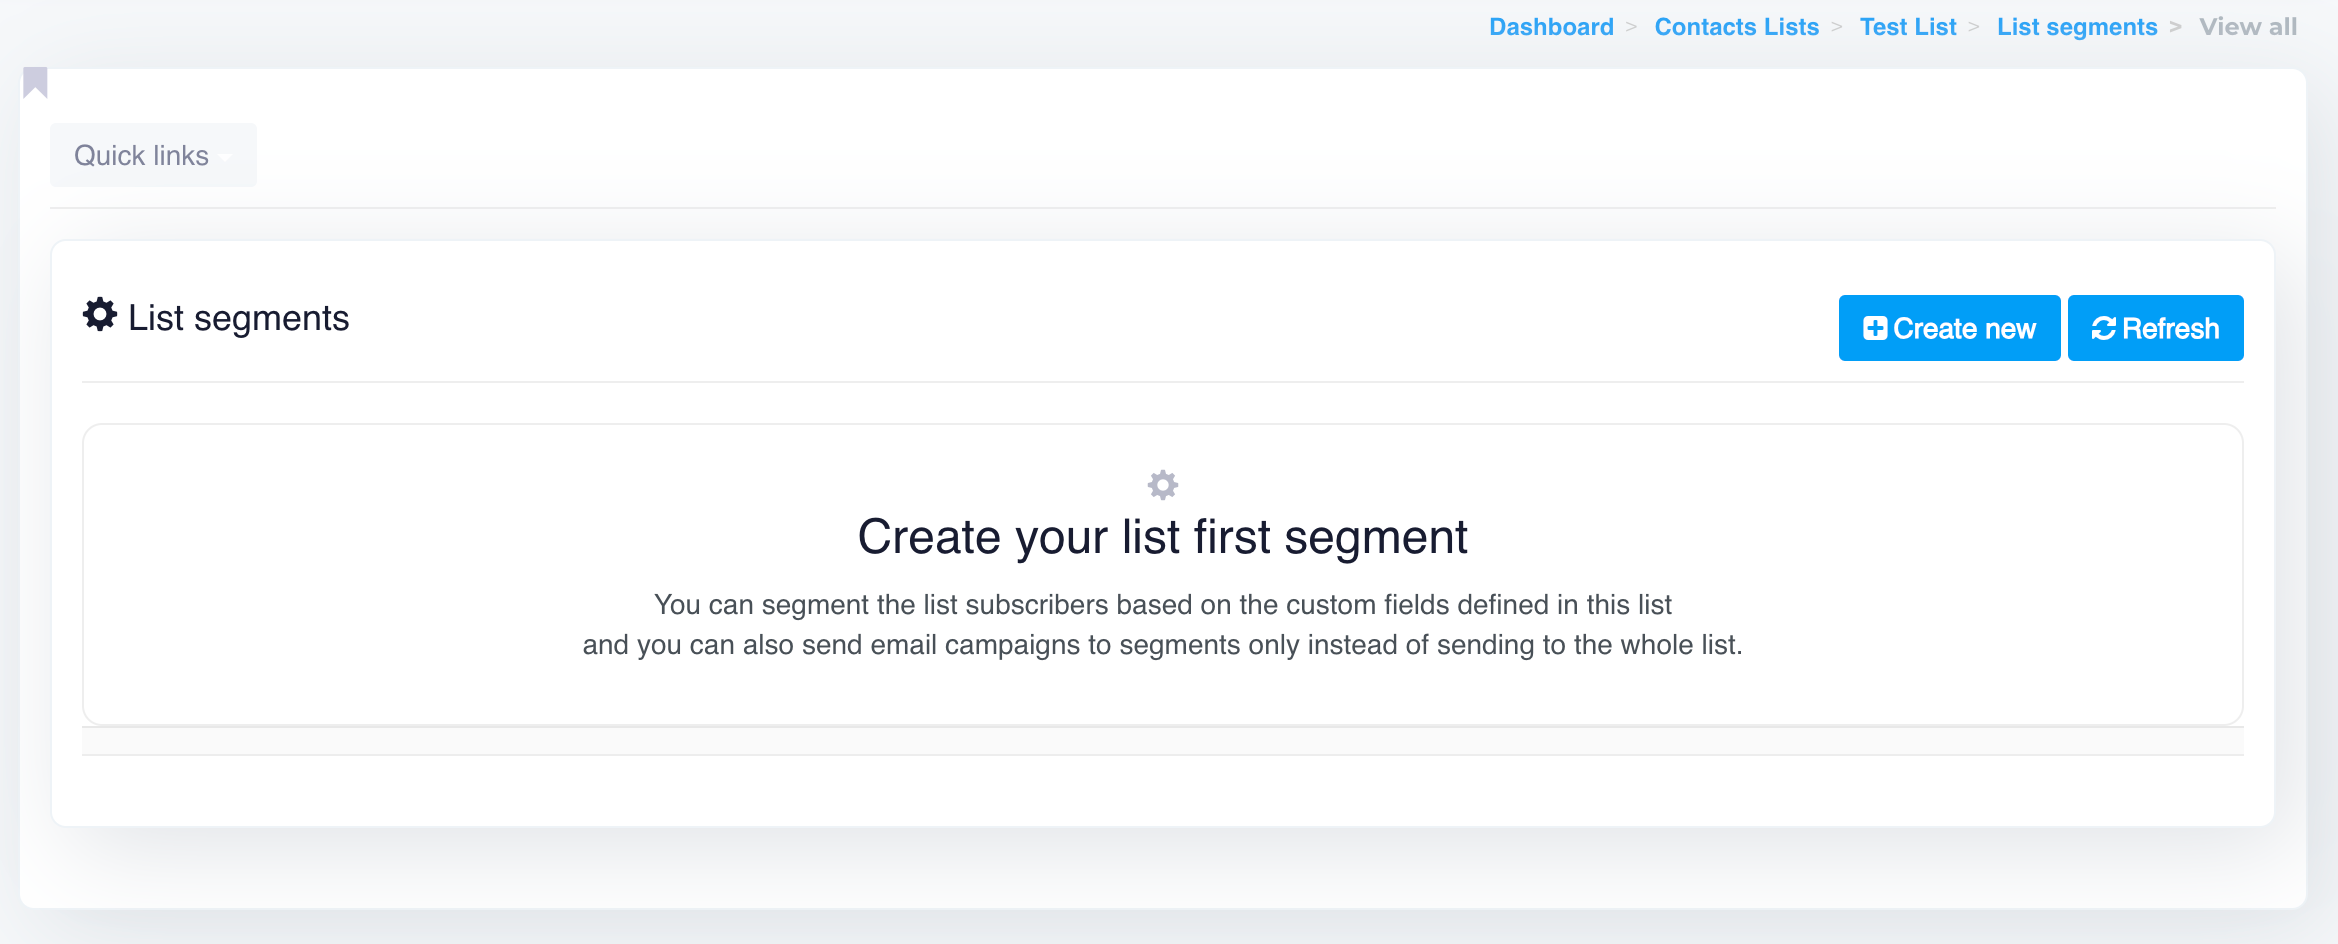
Then click on the **Segments** tab. From there, you can create or manage segments for that specific list.
### 1. Name Your Segment
* **Name**: Provide a name for your segment to easily identify it later. This is mandatory.
### 2. Define Operator Match
* **Operator Match**: Choose between **any** or **all** conditions.
* **Any** means that contacts will be included if they meet at least one of the conditions.
* **All** means contacts must meet all specified conditions to be part of the segment.
### 3. Set Conditions for Custom Fields
Under "Conditions that apply to your list custom fields," you can define filters based on specific fields within your list:
* **Field**: Choose the field to filter by (e.g., Email, Name, or any custom field).
* **Operator**: Select the comparison operator (e.g., "is," "contains," "starts with").
* **Value**: Enter the value for the field (e.g., a specific email address or part of a name).
* **Action**: You can add or remove conditions using the plus (+) and trash bin icons, respectively.
### 4. Set Conditions for Campaigns
Under "Conditions that apply to the campaigns sent to the list this segment belongs to," you can define conditions based on your campaign data:
* **Campaign Action**: Choose the action from the campaign data (e.g., Open, Click, Non-).
* **Campaign**: Select the specific campaign or choose "Any list campaign."
* **Comparison**: Choose how you want to compare the results (e.g., "Less than or equal to").
* **Time Value**: Set a numerical time value (e.g., 60).
* **Time Unit**: Choose the time unit (e.g., Days, Hours).
You can also add or remove conditions using the plus (+) and trash bin icons.
### 5. Save Your Segment
Once all conditions are set, click on **Save changes** to create and save the segment. The system will now segment your contact list based on the specified criteria.
***
 section, select the desired contact list
Then click on the **Segments** tab.
section, select the desired contact list
Then click on the **Segments** tab.  From there, you can create or manage segments for that specific list.